- Words and recipes by Ellie Shortt Photography by Don Denton
In 2020 the world slowed down. It was a forced slowing down with heartbreak and consequences, but for some individuals, communities and even industries, there were profound lessons learned.
Certain folks found these lessons in their kitchens and gardens. With grocery shortages and restaurant shutdowns, many took togrowing their own produce and making their own meals. For the first time in a long time people had…time…and were increasingly drawn to cook methods that took up that time.
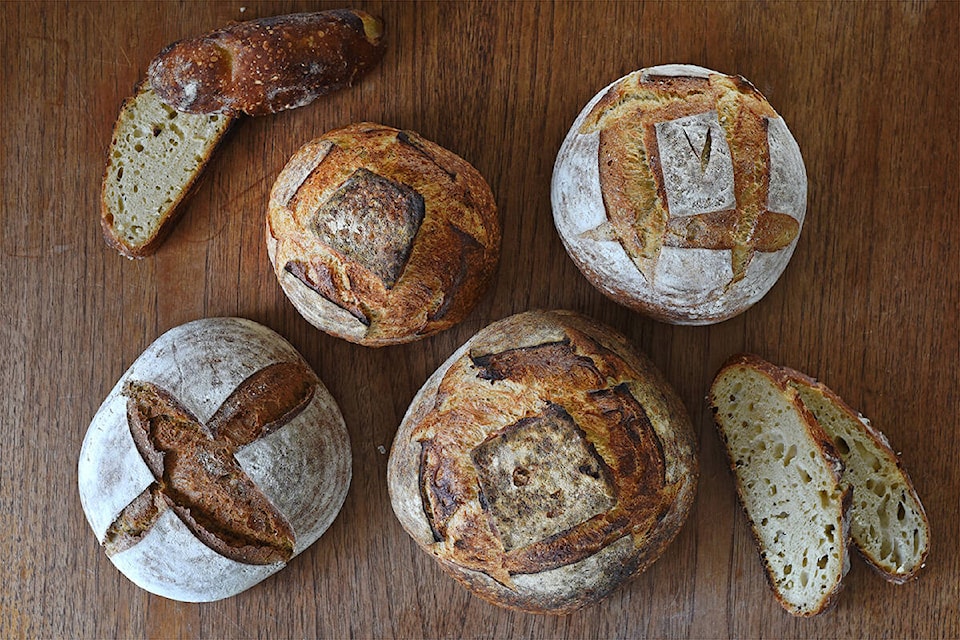
An oft-joked-about example of this was the sourdough spectacle, whereby novice cooks throughout the world became expert bakers, perfecting and comparing fermentation tips and bread-making tricks. Not only did this process require time, patience and a bit of an attachment to one’s abode to execute properly (it takes about 24 hours of feeding, folding, fermenting and forming, before actually popping the dough in the oven), but there was also a sense of connection and community that accompanied the exchange of pictures, recipes and even starters, as neighbours dropped bubbling jars-of-possibility on each other’s doorsteps.
Of course, the process of naturally fermenting bread didn’t begin in 2020. Sourdough is thought to be the most ancient form of leavened bread and was used throughout the Levant more than 5,000 years ago. In fact, “slow cooking” in general—whereby a dish takes many hours (even days) to cook—is integral to almost all indigenous cultures. Slow smoking, pit roasting and the use of earth ovens have been discovered archaeologically in almost every region of the world where humans have dwelt and is arguably one of the earliest forms of cooking.
As you might also imagine, growing one’s own food in the closest proximity possible, now perhaps a luxury reserved for those with roomy backyards or spacious patios, was essential to survival. In fact, cultivating, collecting, cooking and consuming wasn’t just a way of life, it was life, and almost every activity and interaction for much of human existence revolved around these essential skills of survival.
To a great degree, we as a collective society have lost touch with our culinary and cultivating roots. Especially in North America, most store-bought food comes in plastic packaging, is shipped from all over the world, grown in over-farmed, biologically dead and nutrient-devoid soil, picked before peak ripeness, sprayed with all sorts of pesticides and preservatives, and then combined in recipes that boast the shortest prep and cook times. This is not a judgment statement. The demands of modern life for many leave little room (often literally) to grow one’s own produce, visit local farms, and spend hours a day preparing wholesome dinners. Even eating communally is a rare occasion for many; meals are often inhaled while working or watching TV, even while running errands or commuting. Access to time and space is a rare commodity these days, and for far too many, simple access to certain ingredients is impossible, especially in spaces known as “food desserts.”
However, when and where possible, trailblazers have been working hard to rectify this. One in particular is Carlo Petrini, who in 1986 founded Slow Food International in Bra, Italy. As stated on the website (slowfood.com), the goal is to “prevent the disappearance of local food cultures and traditions, counteract the rise of fast life and combat people’s dwindling interest in the food they eat, where it comes from and how our food choices affect the world around us.”
This now global organization has inspired many more communities, groups and individuals to advocate for what is commonly referred to as the slow food movement, recognizing that “through our food choices we can collectively influence how food is cultivated, produced and distributed, and change the world as a result.” While slow-food and other like-minded organizations have thoughtful and meaningful manifestos, outlining key philosophies and providing action steps for international markets, world leaders and changemakers, there are also important and impactful practices for the individual.
The first step is exploring at-home or community gardening. Not only does this create an immediate connection with, and deeper appreciation for, the food we eat, but from an environmental perspective, it decreases the devastating demands of monocropping and mass farming, significantly reducing the harmful impact of these problematic practices, while simultaneously ensuring more nutrient-dense and delicious ingredients in the kitchen.
If you’ve ever picked a tomato fresh from a vine or plucked a snap pea soaking in the sunshine, you’ll know exactly what I mean. Nothing compares flavour-wise. Researchers have also seen substantial increases in mental and physical health when research subjects start gardening, as highlighted poignantly in The Well-Gardened Mind by psychiatrist Sue Stuart-Smith.
The next step to reconnecting with our culinary ancestry is by spending more time in the kitchen. If this feels boring, daunting or lonely, you could try listening to a podcast while you prep, inviting friends and neighbours over to make meals together, and getting your family involved, especially young children. Make cooking (and even cleaning up) the activity, not a dreaded means to a rushed end. Another aspect of this essential return is simply slowing down the process of cooking itself. Take a note from our ancestors: turn the heat down low…and even lower. Take it slow…and even slower. Let the flavours mix, meld and develop over sweet time. Savour the process as well as the end goal. Marvel over how a goopy little mess of microbes, with ample care and connection, can over time develop into a moist, crusty, warm and satisfying loaf of love.
While 2020 may feel like a distant memory, there are lessons we can lean into in our once again fast-paced world—perhaps in glorious resistance to our fast-paced world! Dust off those Dutch ovens and casserole dishes. Resurrect your long-forgotten sourdough starter, or better yet, ask around if any friends, family, colleagues or neighbours have a currently active starter that they can pass along. Share recipes, exchange tips, get the conversation about food, flavours, ingredients and methods going again. Get your hands dirty. Make your aprons messy. Marvel at how some little seeds turn into gardens full of delight. Catch a waft of pleasure as you tenderly clip a handful of thyme or sprig of rosemary. Get back in your kitchen. Cook with love. Eat with appreciation. Sink into each bite. Take it slow…and even slower.
Rustic Sourdough with Honey and Rye
Ingredients
100 g sourdough starter (fed and bubbly)
250 g bread flour
200 g rye flour (darker or light rye is fine)
350 g water
25 g honey
10 g fine sea salt
Directions
Step 1: Autolyse
Weigh out your sourdough starter, water and honey into a large bowl.
Mix them together briefly. Then add your rye flour, bread flour and salt, and mix together with a wooden spoon or spatula (the dough will seem fairly shaggy and only just combined).
Cover your bowl with a damp tea towel and let it sit for one hour, until it’s fully hydrated and more smooth-looking.
Step 2: Stretching and Folding
Work your way around the bowl, grabbing the dough from the outside, stretching it up and over itself until a rough ball is formed. This will take about 20-25 folds to form the rough “ball” (keep in mind rye flour will make the dough stickier than you’re used to, so the shape might be a bit looser than expected).
Place the tea towel back over the bowl and let the dough rest for about 30 minutes.
Repeat this step for a total of four stretch-and-folds over a two-hour period.
Step 3: Bulk Fermentation
After you’ve completed all your stretch-and-folds, place the tea towel back over your dough and let it rest and ferment.
*Note: the time this takes will depend on the temperature of your home. If your home is warm, then your dough will ferment faster and could be done in as little as a few hours. If it’s colder, it will take longer, possibly overnight. You’re looking for the dough to just about double in size, but not more (that means it’s over-fermented).
Step 4: Shaping the Dough
Once the first ferment is complete, prepare a banneton or a bowl lined with a dry tea towel (whether using a banneton or lined bowl, make sure it’s not too wide so as to maintain the shape of the dough) and dust it liberally with flour (I use rice flour for this, as that seems to be a common recommendation).
Lightly flour your counter (also with the rice flour) and use a dough scraper to gently ease the dough out of the bowl. Then use a combination of the scraper and your hands (or just your hands) to gently form the dough into a tight round shape. *Note: if you’ve never done this before, I recommend looking up an online video tutorial.
Once the dough is shaped, place it into your banneton or bowl smooth side down, so the seam is on the top.
Step 5: Cold Ferment
Cover the banneton or bowl loosely with a tea towel and place into the fridge.
Try to leave it in the fridge for a minimum of five hours up to a maximum of 36 hours.
*Note: A longer cold ferment creates lovely blisters on your crust and a deeper sourdough flavour. It will also help your dough form a bit of a skin, which makes it easier to score.
Step 6: Baking
Once you’re ready to bake your sourdough, you’ll need to preheat your oven to 450 F.
Place your Dutch oven into the oven when you turn it on so it gets hot. Cut a piece of parchment paper big enough to use the edges as a “handle” to lower the dough into your Dutch oven when ready. Leave your dough in the fridge until the last minute (placing this dough cold into a hot oven will give it a better spring). When ready, take your sourdough out of the fridge and carefully place it onto the parchment paper.
Score your bread with a sharp razor blade or knife.
Mindfully take your hot Dutch oven out of the oven, place the dough into the pot using the parchment paper as a handle, smooth out any wrinkles/folds in the paper, put the lid on and place into the hot oven.
Bake for 30 minutes with the lid on at 450 F, and then another 15 minutes or so with the lid off at 410 F (the crust will be quite dark, and when tapped, the loaf will have a bit of a hollow sound).
Remove the Dutch oven from the oven, then remove the sourdough loaf and place it on a wire rack to cool. You’ll need to allow this bread a bit longer to cool due to its higher moisture content (if you try to slice into it too quickly, it might be gummy).
*Note: If you prefer a less crusty loaf, wrap in a tea towel and let it cool under that.
Balsamic Thyme Pot-Roast with Parsnips, Carrots, Fennel and Onion
Ingredients
Salt and freshly ground black pepper
One 3-pound chuck roast
About ¼ cup olive oil, divided
1 large onion, peeled and roughly sliced
2 large fennel bulbs, trimmed and roughly sliced
4 medium-large carrots,
peeled and cut in half longways
4 medium-large parsnips,
peeled and cut into quarters longways
4 cloves of garlic, peeled
¼ cup balsamic vinegar
3 cups beef broth
3 sprigs fresh rosemary
3 sprigs fresh thyme
Directions
Preheat the oven to 275 F.
Generously salt and pepper the chuck roast.
Heat some olive oil in a large pot or Dutch oven over medium heat. Add the onions to the pot, lightly sautéing them until slightly golden brown before transferring them to a plate.
Add a bit more olive oil and add the carrots and parsnips into the same pot and toss them around until slightly browned, about a minute or so. Place the carrots and parsnips with the onions. Do the same with the fennel and garlic and add to the other reserved veggies.
Once again, add a bit more olive oil and place the meat in the pot and sear it for about a minute on all sides until it is lightly brown all over. Transfer to a plate.
With the burner still on medium, use some beef broth to deglaze the pot, scraping the bottom with a wooden spatula or spoon. Place the roast back into the pot and add enough beef stock to cover the meat halfway. Add in the veggies, garlic and the fresh herbs, and drizzle everything evenly with the balsamic vinegar.
Put the lid on, then roast for three hours for a three-pound roast. The roast is ready when it’s fall-apart tender.
Blackberry Nectarine Crumble with Honey and Thyme
Ingredients
For the base…
4 cups sliced nectarines (you’ll want them to be ripe and juicy)
2 cups fresh or thawed blackberries
Juice of one lemon
2 tbsp honey
1 loose tbsp fresh thyme
For the topping…
1 cup ground almonds
2 cups old-fashioned rolled oats
½ cup chopped raw pecans
1 tsp cinnamon
½ tsp ground ginger
½ tsp sea salt
¼ cup honey
½ cup unsalted butter, melted
Directions
Preheat the oven to 275 F.
In a medium-sized mixing bowl, combine the base ingredients. Transfer to a baking dish (about eight cups or two litres in volume).
In the same mixing bowl, combine the ground almonds, oats, nuts, spices and salt. Then add the honey and butter and stir until well combined. Spread the topping over the fruit.
Bake for 1 to 1.5 hours, until the topping begins to brown and the fruit below is bubbling.
Serve warm with ice cream, whipped cream or simply on its own!
*Note: If you notice that the top is cooking a tad too fast and over-browning before the fruit is bubbling, take it out, cover your baking dish with tinfoil and pop it back into the oven.
Story courtesy of Boulevard Magazine, a Black Press Media publication
Like Boulevard Magazine on Facebook and follow them on Instagram